

 | |||||
| FACIAL MASK |
Getting a professional facial can be expensive, however you don’t always have to rely on other people to make you
look beautiful; you can do it yourself in the comfort of your own home!
Maintain your skin’s health by doing this at-home facial once a week. By applying face masks once a week, you clean up the pores, remove dead skin off your face, and get rid of your skin problems.
Here you will find the easy steps for applying your facial mask.
Here you will find the easy steps for applying your facial mask.
Step 1: Cleanse

Before beginning your facial, apply cleanser to wet face and throat in upward circular motions. Begin at the base of the throat and work upward into the facial area. Cleanse from the center line of the face, working outward towards the sides and gradually up to the forehead. Rinse thoroughly and then cleanse again to break down oil, dirt, and make-up. Rinse thoroughly again. Getting the dirt out is very important when it comes to keeping healthy and clear skin since dirty skin causes bacteria.
Step 2: Steam
When you get a professional facial done, they always steam your skin. Just with a simple facial steamer you can do it yourself too. Or if you don't have any steamer, simply boil some water dip a washcloth and press to your face. Repeat this step about 2-3 times. This will open up your pores and make your face softer and easier to work with.
Step 3: Exfoliate
 Exfoliating is one of the most important steps in skin care because
this is the part where you actually slough off dead skin cells that can
pile on top of one another and cause flakiness, dry skin, and even
pimples, depending on your skin type. Gently massage an exfoliating face
wash into circular motion on your face, concentrating on the oily parts
such as your chin and forehead.
Exfoliating is one of the most important steps in skin care because
this is the part where you actually slough off dead skin cells that can
pile on top of one another and cause flakiness, dry skin, and even
pimples, depending on your skin type. Gently massage an exfoliating face
wash into circular motion on your face, concentrating on the oily parts
such as your chin and forehead.
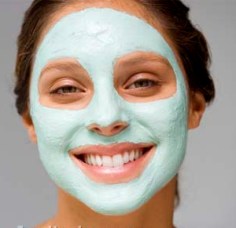
Step 4: Mask Yourself
 Apply a mask to your face. For dry skin, use a hydrating gel or cream
mask and for oily skin use a clay-based mask. Leave it on for 10-20
minutes (depending on the directions on the package), making sure to
avoid the eye area when applying. Rinse off with warm water and pat dry.
Apply a mask to your face. For dry skin, use a hydrating gel or cream
mask and for oily skin use a clay-based mask. Leave it on for 10-20
minutes (depending on the directions on the package), making sure to
avoid the eye area when applying. Rinse off with warm water and pat dry.Step 5:Toner

Apply by misting, patting, or using cotton pads to entire face and throat. Use fingertip tapping to cool skin. Toner will help to remove all traces of mask and will smooth down pores.
Step 6: Moisturize

The last and final step is to moisturize your skin. Make sure you choose one that matches your skin type. For example, if you have oily skin, go with a very light moisturizer as not to clog your pores. For dry skin, choose a thicker moisturizer. Massage gently over your face and neck using slow, circular motions.
You're done!!! Now you have a totally clean, soft and moisturized skin!!!
Most people have a phase of their life their skin doesn't look its best. Of course, there are always expensive dermatologists that you can learn a thing or two from, but especially in these times, we can't always afford to go to one. They have all this face stuff you can buy, but if you really want to wait 6 weeks to begin seeing results, then this isn't the article for you. If you want clear skin cheaply in one week, then keep reading. If you read this in the summer time, then you'll have clearer skin for the new school year! This might not help everyone of you but you might as well try it because it might but don't get annoyed if it doesn't because there are a lot of other things you can try. Waxing Slough
ReplyDelete