Showing posts with label DIY at Home. Show all posts

Friday, November 30, 2012

BEDROOM IDEAS: COLOR, STYLE AND DESIGN


Looking to decorate your bedroom? Here you will find some gorgeous, stylish bedroom design ideas which are in different styles and colors.

I hope these pictures inspire you before you make a decision.


Which one would you choose? ;)

Thursday, October 11, 2012

BRIDAL MAKEUP: How to Do Your Own Wedding Makeup


Bridal Makeup

It is every girls dream to become a bride. You want to look your best because your wedding day is the most important and happiest day in your life. All you want is a radiant, fresh looking, flawless skin and a young healthy glowy look! 


If you like the idea of doing your own bridal/wedding makeup,  here you will find the tips and tricks on how you can do it yourself.

What you will need is:

- Moisturiser
- Makeup primer
- Foundation
- Concealer
- Face powder  (2 shades: light shade for under-eye, darker shade for the rest of your face)
- Blush
- Lip liner
- Lipstick
- Eyeliner
- Eye pencil
- Eyelash curler
- Mascara (preferably waterproof)
- Eyeshadow primer
- Eyeshadow
- Brushes and sponges


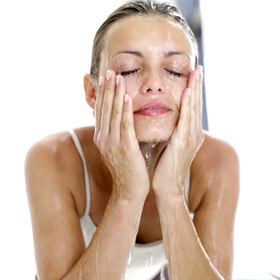
1. Start by washing your face. Get rid of the excess oils off your face.


2. Apply moisturiser. Dry skin will make the cosmetics look uneven on your face. Wait a few minutes so that moisturiser penetrates the skin. 


3. Apply primer. Makeup primers are essential for such events. They prolong the staying power of your makeup.


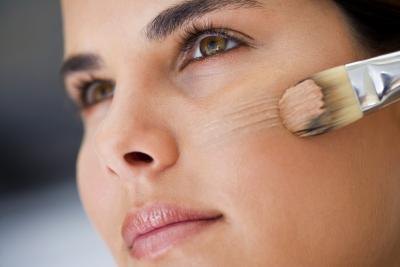
4. Apply your foundation evenly, preferably with a brush or a wet sponge.


5. Conceal your under-eye area, or any imperfections on your face. Use a concealer brush or a sponge.


6. Apply light-colored face powder generously over your undereye area with a sponge.


7. Apply the darker (which fits your own skin color) face powder all over your face, skipping under-eye area.


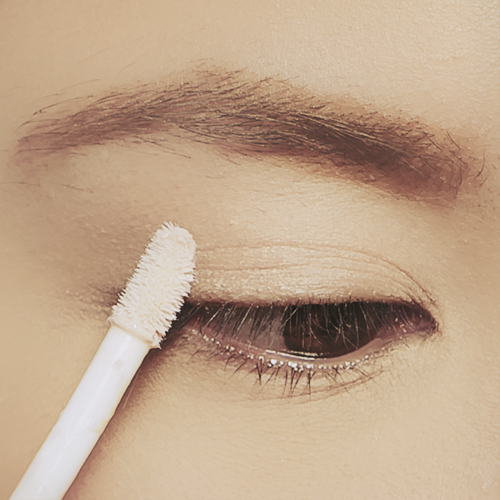
8. Apply eye primer so that your eyeshadow will stay put and will look more radiant.


9. Do your eye makeup. Don't forget to highlight your brow bone.


10. Curle your lashes.


11. Apply your eye-liner and/or eyepencil.


12. Put on your mascara. Water proof mascara is much better on such events as there is a possibility you will cry.


13. Brush on your blush on the cheek bones. You can highlight above the cheekbones.


14. Apply lip liner, then your lipstick.


15. Finish with a makeup fixing spray. (optional)


Finished Look


GOLDEN TIPS AND WARNINGS:

- Make several trials. Practice.
- The key is to look like yourself, only better. 
- Most important thing is your skin tone: choosing your foundation. 
- Use makeup primer and eyeshadow primer to make your makeup stay longer
- Pluck your eyebrows and remove your facial hair the day before your wedding: Allow time for any redness or irritation to lessen.


This is me, with the make up i did myself on my wedding day


Thursday, September 20, 2012

NAIL ART: How to Make Designs on Nails


Glitzy Glam Nail Art Designs
Glitzy Nail Art Designs


The world of nail art designs is endless, so let your imagination run wild and create personalized nail art designs that can make you become a nail queen. Take a peek at the following glitzy nail art designs and inspire yourself for your next manicure!


There are tons of nail products and techniques out there to use, so you can create a personalized nail art design that will suit your style perfectly. Nail art has become a definite must, so learn how you can obtain a trendy-chic manicure without spending tens of dollars on expensive salon manicures. There are a few nail art designs which are super popular and look incredibly stylish and feminine, yet don't require too much skill, so take a peek at the following chic nail art designs and try to recreate your favorite look or draw inspiration for a unique design. 


Before learning how to create stylish nail art designs, you should invest in some high quality nail polishes as well as some nail art tools such as a dotting tool just to make things easier.

Nail Art Designs

Nail Art Designs


French tips with glitter or gorgeous nail polish colors can be the easiest way to a stylish nail art design. You can use guiding strips to help you create a perfect line which you can purchase or create your own using scotch tape. Use your favorite color and glam-up your nails using glitter dust or flakes, depending on personal preference. Soft lines and dots created over the French tip can give that high dose of sophistication that grabs all the attention.


Chic Nail Art Designs


Flowers can also be a perfect alternative for a chic nail art design and there are a variety of techniques which can be used to create floral nail art designs. You can add dry flowers to your nails or you can try to create your flowers with the help of the dotting tool or a professional nail art brush and acrylic paint. Use contrasting colored flowers to make the design pop and steal attention, so go for purple, yellow, pink, blue, coral, fuchsia, green, orange as these are the most popular hues to try, especially during the summer.


Chic Nail Art Designs

Chic Nail Art Designs

Nail Art Designs


If you're not too skilled at doing your own nail art designs and wish to start easy, you can apply a nail polish and use nail art stickers to give that sophisticated touch to your nails. Always seal your nail art design using a clear top coat as this can really make a difference. Allow the nail polish to dry completely before applying a top coat to prevent the nail polish from blending and smudging. 


Pay attention to details and your nails will definitely capture everyone's attention.


Related Posts Plugin for WordPress, Blogger...