Showing posts with label Celebrity Look. Show all posts

Monday, March 11, 2013

GLITTER MAKEUP


Glitter  adds a touch of glamour to any make-up. Glitter cosmetics are any type of makeup products that contain glitter; this can be everything from lipstick to eyeliner to body glitter. Some have large, noticeable pieces of glitter in them, while others just provide a light shimmer. The type of glitter cosmetics that an individual chooses to wear largely depends on the look desired, as well as a person's age. Kids and teens, for example, are big fans of over-the-top glittery cosmetics that provide a lot of sparkle, while older women might only want a little extra shimmer in a bronzer or eyeshadow to make the face look brighter.
Lipsticks and eyeshadows are some of the most popular types of glitter cosmetics. Eyeshadow for teens, or to be worn at special events, might have large pieces of glitter in it, but there are many different types of eyeshadow that just have tiny reflective particles that add a bit of shimmer. These can really make the eyes pop, and look bigger and brighter. Glitter eyeliner can have a similar effect as well. Glittery lip gloss, worn on its own, or over the top of a darker lipstick, can also make the lips look shimmery and bright. Adults typically do not wear glittery lip gloss, but again, there are some more subtle options that add a bit of brightness and shimmer.
Bronzer and blush are other types of glitter cosmetics that often include light reflecting particles to make the face look brighter and more awake. Foundation or concealer are two types of cosmetics that typically do not include glitter. For those looking for a more dramatic look, such as for stage makeup or another type of special event, there is dedicated glitter makeup that can be smoothed over the skin in a similar way to foundation, but this is not a product that would be worn on an everyday basis. This is often referred to as body glitter, and is typically sold in a small jar or tub.


It is important to always remove glitter cosmetics at the end of the day; the makeup can clog the pores if it is left on the skin, or it can cause extreme eye irritation if eyeshadow or eyeliner is not removed and glitter gets in the eyes.


Friday, November 30, 2012

EXTREME EYELINER: Amy Winehouse' Winged Eyeliner


Winged Eyeliner of Amy Winehouse


Amy Winehouse (R.I.P.) had a pin-up make-up style: Lots of black and red... and a winged eyeliner.


A bold red pout competes with the eye. The result is done up and dramatic.

The Amy Winehouse "winged" eyeliner has inspired a thousand magazine covers. Karl Lagerfeld once described Amy Winehouse as a style icon. Indeed her vintage-inspired dress sense, beehived hair and winged eyeliner were certainly replicated worldwide by adoring fans, designers, stylists, makeup artists and fashionistas alike.


A Style Icon


Amy made her bold beehive hairdo and exaggerated winged eyeliner her trademark style and a whole generation of young girls followed suit. All the Amy Winehouse essentials - amazingly big hair, winged eyeliner & a bit of retro.


And here is how to wing your eyeliner:


What you will need:

- A liquid eyeliner

 
- Or a gel eyeliner and an eyeliner brush


-Or a liquid pen


So, now a bit of a demonstration. I'm sure there are many other ways to achieve this but this is just my technique. Don't try to do the whole thing all in one sweep without lifting your brush as you'll lose all precision. I break it down into three steps which I've shown below:


Step 1. Draw a thin line close to your eyelashes. Don't worry about any wing just yet. This line also doesn't need to be overly neat as we'll be going over it again later anyway. It's really important to tilt your head backwards when doing liner because you need your eyelid to be as flat and smooth as possible so that you get a nice fluid line.

Step 2. Draw in the outer line of your wing. This should generally angle upwards in the same direction as your lower lash line. Just imagine that your lower lash line is continuing on upwards. If you have a hooded eye, however, you may need to angle your liner slightly more outwards in order to avoid the hooded area. The length of your wing is down to personal preference. If you want a dramatic liner make the wing longer and make it shorter for a more subtle one.
Step 3. Now you need to connect the wing back to the line along your eyelashes. I've mapped it out here in red. Don't start at the very tip of  your wing. Leave the very top of it alone as that part should be left extremely fine. Now connect the wing back down along your eye, gradually making it thinner as you reach the inner corner of your eye. So it should be thicker on the outer part of your eye and thinner towards the inner corner.


That's it! If you need to go over it again to fix any lumps or bumps or to thicken it then you can. Now you just need to line your waterline if you want to and apply your mascara and you're done!


GOLDEN TIPS

-Always start from the inside and stroke outward in one fell swoop. Don’t try to do it in portions, just go for it–it’s silly, but it’s all about believing in yourself.
-When you get to the end of the lashes, go slightly upward. Remember, the more drama you want, the more distinct the angle should be.
- If you mess up at the end, don’t fret, just use a cue tip or tissue with a bit of gentle lotion or makeup remover to remove the wing. Then just try again. If the whole line is a mess, wipe it all off and start all over.

Amy's eyeliner is a a bit more exaggerated... When you look at the pictures, you will see that amy's eyeliner covers almost all of her eyelids then angles up as it's going outward. 


In this picture she is using RIMMEL Exaggerate eyeliner:


Rimmel Exaggerate Eyeliner


Saturday, November 10, 2012

PORES: How to Minimize Pores

LARGE PORES


Celebrities and models always look so gorgeously pore-less in the photos staring out at us from their magazine covers. They have pores just like the rest of us. Having pores is a non-negotiable part of having skin. In fact, we need to have them because they are essential to skin function.
Large pore size can be frustrating because it can interfere with an otherwise smooth quality to skin, and generally speaking, a large pore size is visually unappealing.


Why do we have large pores?

Your pore size is partly a matter of genetics and partly due to whatever is currently trapped inside of them. If you have a lot of oil or dead skin cells accumulating in your pores, that can stretch them out and make them look bigger.


And with most skin-related problems, the appearance of your pores can get worse due to sun exposure and aging. Both have a negative impact on collagen and elastin—the two components of your skin’s structural support system.

Exposure to ultra-violet rays creates molecules called free radicals that destroy your existing collagen and elastin. And one of the natural effects of getting older is that production of new collagen slows down. The combined effect means that what’s being damaged daily by sun exposure isn’t being repaired and rebuilt quickly enough.  When you lose support around your pores—because of a loss of collagen and elastin—they start to sag and look larger.


How can we minimize large pores?

As pore size is usually genetic, and there is not much you can do to make them permanently smaller. Do not fall for claims stating a product will reduce your pore size. However, there are some tips and tricks you can employ to temporarily minimize the appearance of pore size.

Here are the tips to minimize your pores:


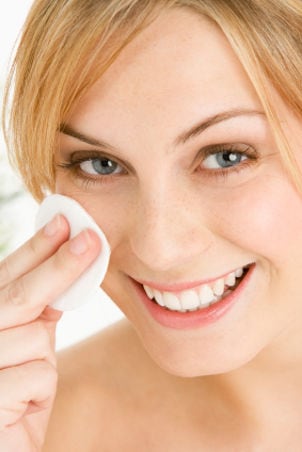
1. Keep Your Skin Clean


Exfoliate once a week to clean clogged pores. It is easier if you use facial steamer first then exfoliate gently. Clean pores look smaller.
You can use face washes, cleansers and masks which contain salicylic acid. It works to minimize pores by keeping them clear. It penetrates pores and helps to dissolve and dislodge oil, dirt and dead cells.


2.Use toner


Using a toner, or an astringent, after cleansing your face (before moisturizing) can help reduce the appearance of large pore size. Astringents constrict pores as well as help remove that last bit of oil and dirt. 


3.Use sunscreen daily


It is one of the few things you can do to help keep the skin's support structure strong and pores minimized. Look for a daily moisturizer that contains a broad-spectrum sunscreen and an SPF of 30 or higher. 


4.Use retinoid
 
Pore-Minimizing Secrets


Whether it is an over-the-counter retinol or a prescription-strength Retin-A, the active ingredient helps stimulate new collagen production in the skin. More collagen means better skin structure, and that means pores don’t sag and look larger.


5.A Little Makeup Help


Start with a primer to help smooth out the appearance of the skin and fill in pores so that foundation goes on flawlessly. Mineral powder foundations can give an airbrushing effect to the skin. For the most pore-minimizing coverage, apply it with a dry makeup sponge, pressing the powder firmly into the skin, and then buff off any excess with a large powder brush.


*****Follow this skin care regimen carefully if you are self conscious about your pores. You will observe your pores get cleaner and smaller, and your skin look much healthier.***** 


Saturday, July 28, 2012

HOW TO HIGHLIGHT YOUR FACE: Magazine Look


Highlighting your face makes your skin glow, helps to minimize or maximize facial features and gives you that finished sheen you see in magazines.

It makes you look healthier, glowy and gorgeous when you illuminate the right places of your face.

All you need is a product at least 2 shades lighter than your skin and it should contain slight shimmer to make you glow.


You should be careful where to highlight, as highlighting makes pop the area. If applied on wrong places, it will make you look older, shiny or greasy.

There are plenty of highlight products, in cream, liquid or powder form.


NARS Illuminator

MAC Color Base-Pearl  (My favorite for cheekbones and browbones)

MAC Paint Pot-Painterly


If you haven't bought any yet, you can use a nude/vanilla color eye shadow for highlighting. 

MAC Vanilla Eyeshadow


Places to highlight:

1)Top of your cheekbones
2)Under your eyes (after concealing dark circles)and corner of your eyes
3)On your browbone
4)Center of your forehead
5)Straight down the middle of your nose
6)middle of the top of your lip
7)Your chin


Highlighting your face


- If your product is in powder form, you will need a highlight brush.


Highlight brush


- If it is creamy, you can use your hand as well as using highlight brush depending on its consistency.


- You can use smaller highlight brushes if you like.


Small Highlight brush


Highlighted faces


You can obtain that "Magazine Look" you've been looking to with illuminating the right places of your face correctly.
Related Posts Plugin for WordPress, Blogger...